the trouble of dealing with my ISP
Part 2: I got nervous getting a public IPv4 address from my ISP, and protecting my Pi from the port attackers out there.
This year, I decided to purchase a domain to, maybe, have a nice little corner on the Internet. I chose this .com domain and paid a little over 11 U.S. bucks (around 270.000 VND at the time, more on this later). At first, I set the domain to point to my GitHub Pages (and later Sourcehut Pages) as I was scared to embrace the idea of getting a public IP address at the time.
Because of Internet of Things and every Internet-connected appliance having to be assigned an IP address, companies around the world have bought every public-facing IPv4 address blocks available from ICANN (public-facing, accounting about 580 million reserved addresses.) IPv4 addresses, the ones with four blocks of 0 through 255, have pretty much run out. To combat this issue, ISPs have been placing people behind what are called Carrier-Grade NATs (CG-NAT). Think of them as massive routers: each group of devices is only assigned a public-facing IP address.
(I know I did some massive simplification there, because often companies don’t reserve IP address blocks directly from ICANN but from their regional Internet address registries, such as APNIC. Also, people are embracing the IPv6 address standard, which holds a serviceable, virtually infinite number of IP addresses to assign to devices.)
Almost everyone is fine behind CG-NATs as long as they have access to the Internet. For those who want to host things online, they rely on companies providing centrally managed servers (cloud services) such as Amazon Web Services (AWS), Google Cloud, Microsoft Azure, Cloudflare, Netlify, Vercel, and the like. For self-hosting purposes, as I’m about to do, however, it means no one would be able to reach my Pi.
Most ISPs around the world provide a fixed IP rent service for businesses, and ours do too. Our government restricts the external IP addresses that can reach its databases, for security purposes, so companies would rent IP addresses to register with the National Tax Department. The problem is, the monthly rate (600,000 VND/month, or over 22 USD) is too costly for an individual to rent one, you have to be a legal business entity and file papers stating your purposes for getting a static IP address; not to mention getting approval from the ISP itself.
I turned to seek some advices from the Vietnamese home network community, who certainly has more experience in self-hosting and dealing with ISPs than me.
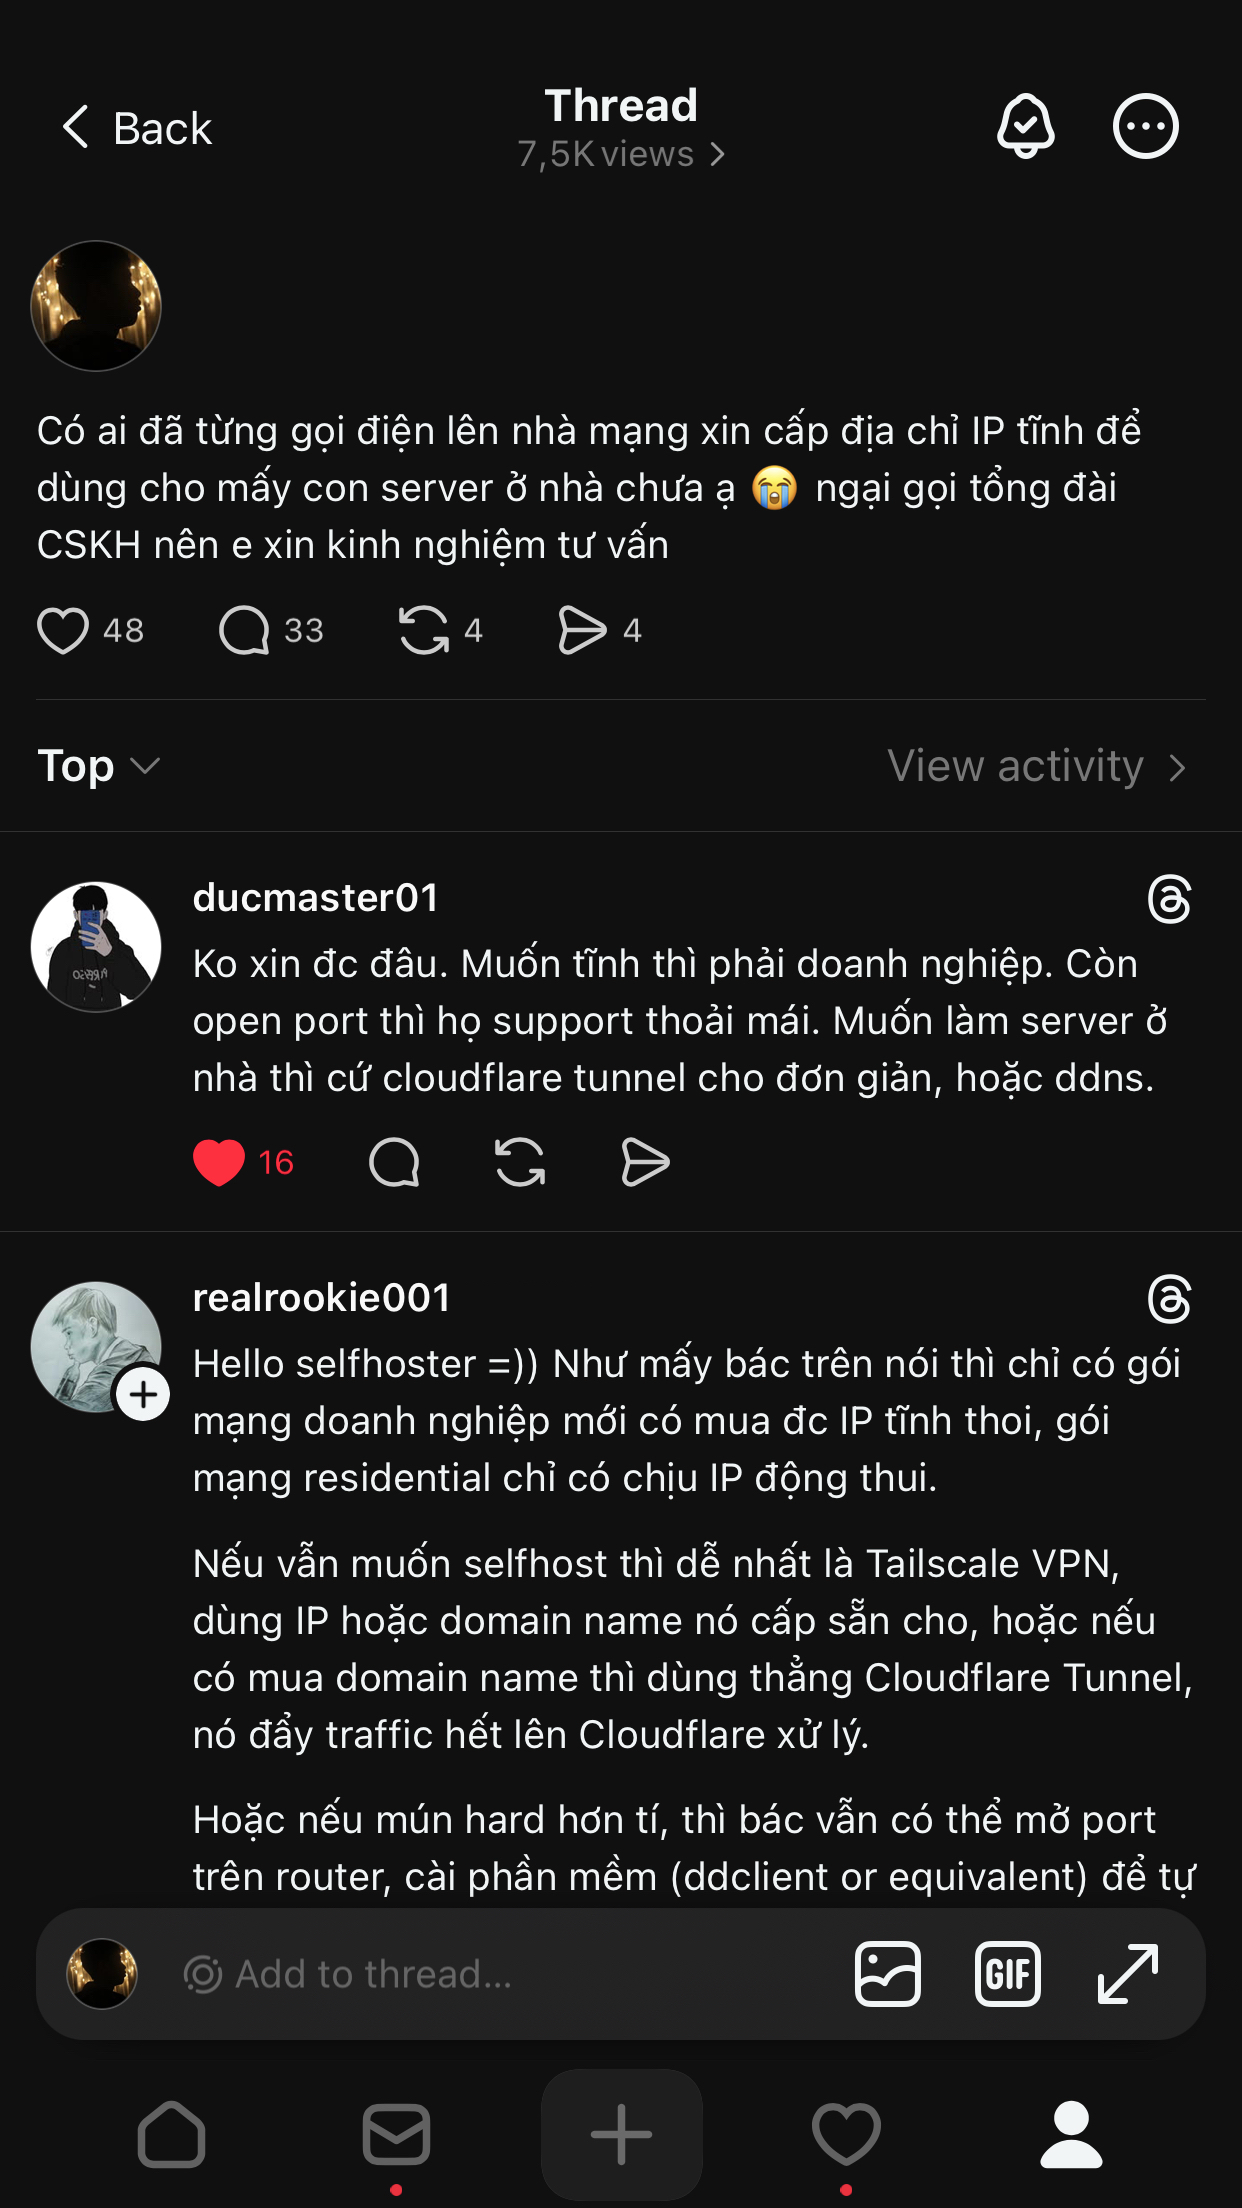
Many comments suggested using a middle-man service, such as CloudFlare Tunnel, which assigns a public IP address for my Pi on CloudFlare’s servers. As it turns out, CloudFlare Tunnel doesn’t support WebSocket POST calls, which I would later need to self-host one of the services.
One comment from @realrookie001, however, pointed out an alternative, yet quite more advanced solution: enable port forwarding in the dashboard of my ISP’s modem, which routes all Internet traffic to my home IP address directly to the Pi. Then, as the ISP updates my public IP address, I could use a tool on my Pi, such as ddclient to get the new address and send that to my domain provider.
@ducmaster01 assured me that ISPs are more open to requests for assigning a public IP address, and perhaps I could call their support number and ask if they can move me away from their CG-NATs.
Time to port forward
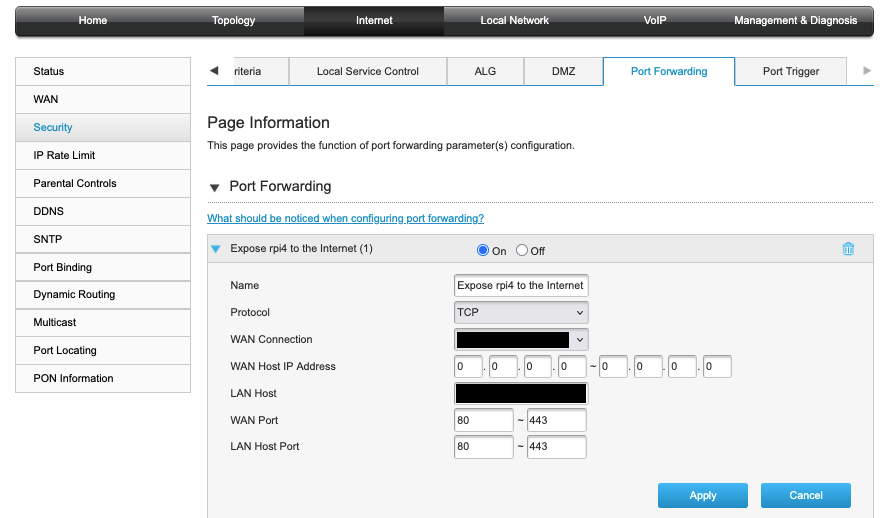
Eventually I got to work. By sheer luck (and definitely not just looking at the default username and password printed on the back), I was able to guess my way into my ISP’s modem. I decided to get my Pi’s MAC address and configure the modem to forward all traffic on port 80 (for HTTP) and port 443 (for HTTPS) to the Pi.
I knew that I was behind a carrier-grade NAT, because the WAN IP address that the ISP gave to my modem and the public IP address when I ran curl ifconfig.me on my Pi were’t the same. So I had to call their support number and request to be moved to the public address pool.
I was nervous. I’ve worked as a customer support representative at a call centre before, and I knew the pressure of taking the next call right after getting yelled at by a customer for their dissatisfaction with the service, and the urge to vent the anger; having to forward customer requests to the upper departments, or deny requests outright even when they were technically feasible, because a representative doesn’t have the authority to do things by themselves.
Then my phone rang.
“Hello, is this Mr. Duc? I saw your service request on our support app, you want to be assigned a public IP address to your modem, on the contract number […]?”
I was too nervous to call their support number, so I opened a service support ticket in the app in the hope that they would understand the situation.
“I’ve assigned a new IP address to your modem. Please hold for a minute or two and check if you’re on the new public IP address.”
That was quick. Maybe I’m just an introvert guy who was shy to take calls from strangers, and I was overthinking for a bit. Or I was making a request at 11:30 in the night and the support man wanted to get things done as quick as possible.
But as I refreshed the modem dashboard and ran the command again on my Pi, the IP addresses became matching with each other. I jumped. I couldn’t think it was as simple as that.
Shell my Pi securely from port 22 and other port attack
I remember watching a YouTube video on finding Chinese scam websites and attacking common open ports of their servers. Unfortunately I wasn’t able to trace back that video to link here (possibly from John Hammond?)
It’s not difficult, nonetheless, to find incidents where hackers gain unauthorised access to servers, as the maintainers of those servers did little to no effort to implement any protective measures, such as closing port 22, which is often exposed for remote access over SSH, or only locking SSH access behind a layer of password.
Keeping that in mind, on the Pi, I installed Uncomplicated Firewall (ufw) and configured it to block all external access into all ports, except port 22 for SSH, which I restricted access to devices within my local network only, port 80 and 443 for the Nginx web server; and set up SSH to authenticate using public-private key verification.
ufw acts as an abstraction layer and uses either iptables or nftables as the back-end firewall.
I made sure to disable any other firewall services in place, then followed the ArchWiki entry for ufw, which instructed me to install the ufw package, enable the systemd service, and enable the firewall.
I got lucky
I can now rest easy knowing I can start building my presence on the web. But another day I shared this story on a call with a fellow developer, who lives in a shared apartment. And for him, things didn’t turn out as easy as I thought they would be.
In shared apartments, an ISP usually signs a contract with the construction project owner to provide their Internet service for the entire apartment. He’s stuck with whichever ISP providing the service there. It took a lot of time before he was given the credential to access the modem by a service repairman, and he was denied permission to have a public IP address, due to the way it was set up that could affect the Internet security of the entire apartment.
You might have better chance at this if you live in a house, I guess.